Contentful
In this document, you’ll learn how to integrate a Medusa backend with Contentful to add rich Content Management System (CMS) functionalities
Overview
Contentful is a headless CMS service that allows developers to integrate rich CMS functionalities into any platform.
By integrating Contentful to Medusa, you can benefit from powerful features in your ecommerce store including detailed product CMS details, easy-to-use interface to use for static content and pages, localization, and much more.
Prerequisites
Needed Accounts
- Contentful account with a space created. A space is created by default when you create a new account.
Required Tools
- PostgreSQL with an empty database created. You can follow this documentation to learn how to install it for your operating system.
- Redis. You can follow this documentation to learn how to install it for your operating system.
- Git’s CLI tool. You can follow this documentation to learn how to install it for your operating system.
- Gatsby’s CLI tool. You can follow this documentation to install it.
- Medusa’s CLI tool. You can follow this documentation to install it.
Install Medusa Backend Using Contentful Starter
Instead of using the default Medusa backend starter, you must use the Contentful starter to install a backend that is ready to be used with Contentful. This backend contains all the necessary files to make the integration work.
In your terminal, run the following command to install the backend:
medusa new medusa-contentful https://github.com/medusajs/medusa-starter-contentful
This installs a new Medusa backend in the directory medusa-contentful.
Add Contentful Environment Variables
Change to the medusa-contentful directory. In .env you’ll find three variables:
CONTENTFUL_SPACE_ID=
CONTENTFUL_ACCESS_TOKEN=
CONTENTFUL_ENV=
Value of CONTENTFUL_ENV
Set the value for CONTENTFUL_ENV to master.
Value of CONTENTFUL_SPACE_ID
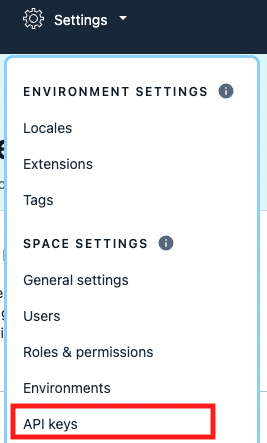
To retrieve the value of CONTENTFUL_SPACE_ID, go to your Contentful Space dashboard. Then, choose Settings in the navigation bar and select API keys from the dropdown.
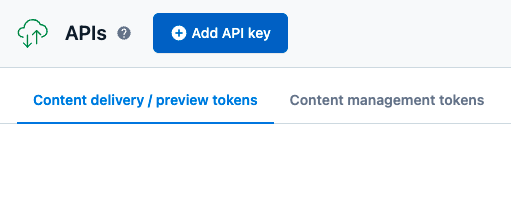
On the APIs page, click Add API Key.
In the form, enter a name for the API key and click Save.
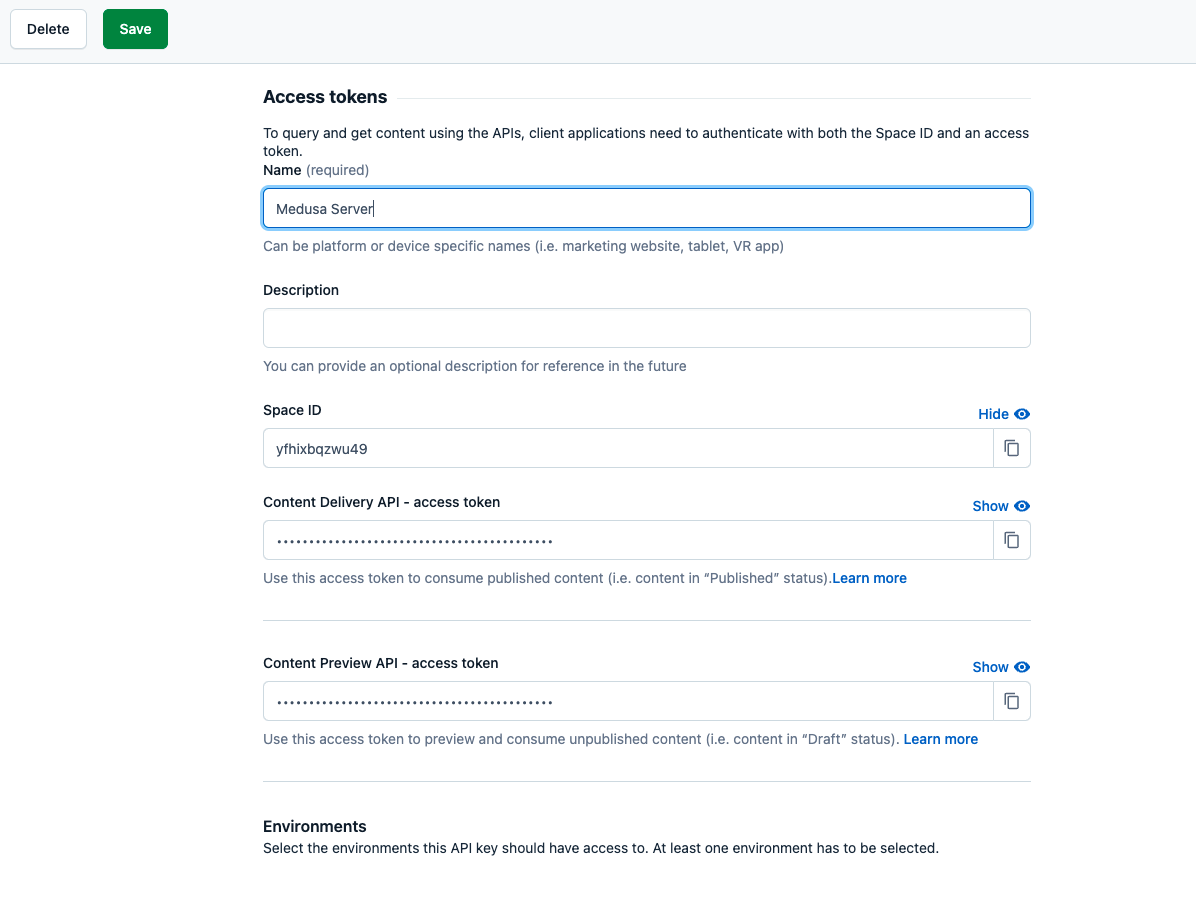
Then, copy the value of Space ID and set it as the value of CONTENTFUL_SPACE_ID.
Value of CONTENTFUL_ACCESS_TOKEN
Go back to the API Keys page and click on the Content management tokens tab.
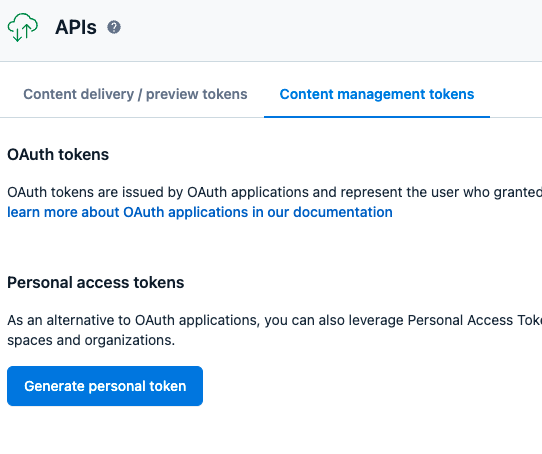
Click on Generate personal token. A pop-up will open where you have to enter a name for the token.
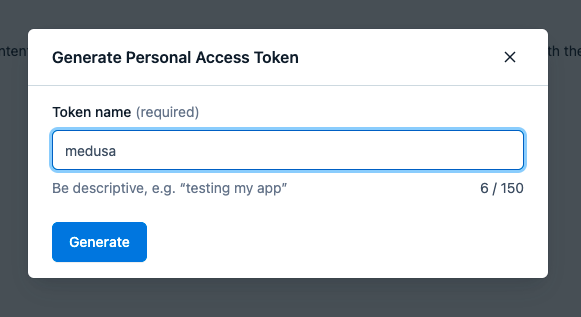
Once you click Generate, a personal access token will be generated. Use it to set the value of CONTENTFUL_ACCESS_TOKEN.
Once you close the pop-up, you won’t be able to get the value of the personal access token again. Make sure to copy it first.
Configure Redis
In .env set the value of your Redis URL:
REDIS_URL=<YOUR_REDIS_URL>
Where <YOUR_REDIS_URL> is the URL of your Redis service.
The default Redis URL is redis://localhost:6379.
Configure PostgreSQL
In .env set the value of your PostgreSQL URL:
DATABASE_URL=<YOUR_DB_URL>
Where <YOUR_DB_URL> is the URL of your PostgreSQL database.
You can find the format of the PostgreSQL database URL in PostgreSQL’s documentation.
Then, in medusa-config.js in the exported object, comment out or remove the SQLite database configurations and add the PostgreSQL database configurations:
module.exports = {
  projectConfig: {
    // ...
    database_url: DATABASE_URL,
    database_type: "postgres",
    // REMOVE OR COMMENT OUT THE BELOW:
    // database_database: "./medusa-db.sql",
    // database_type: "sqlite",
  },
}
Migrate Content Types to Contentful
The Contentful starter provides the necessary scripts to create content types in your Contentful space.
Run the following commands to migrate the content types into Contentful:
npm run migrate:contentful
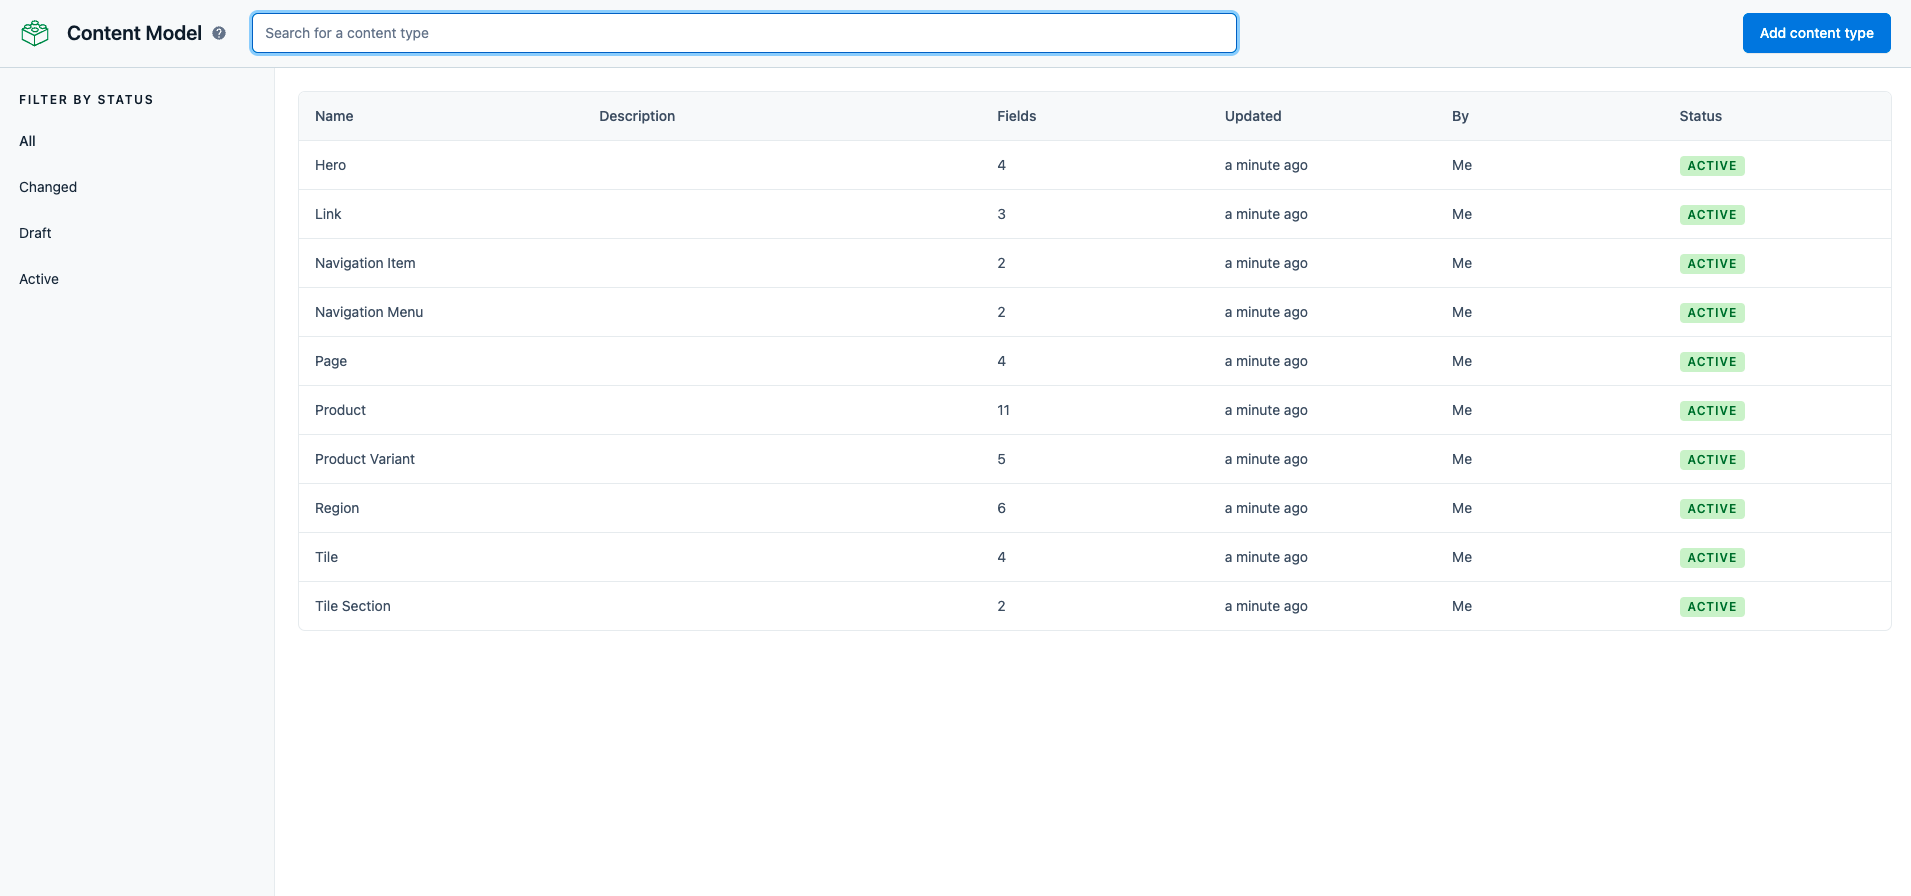
Once this command finishes executing, in your Contentful Space dashboard click on Content Model in the navigation bar. You should see a list of new content models added.
Seed Content to Contentful
The next step is to seed the Contentful Space with some content data.
Run the following command to seed some data into it:
npm run seed:contentful
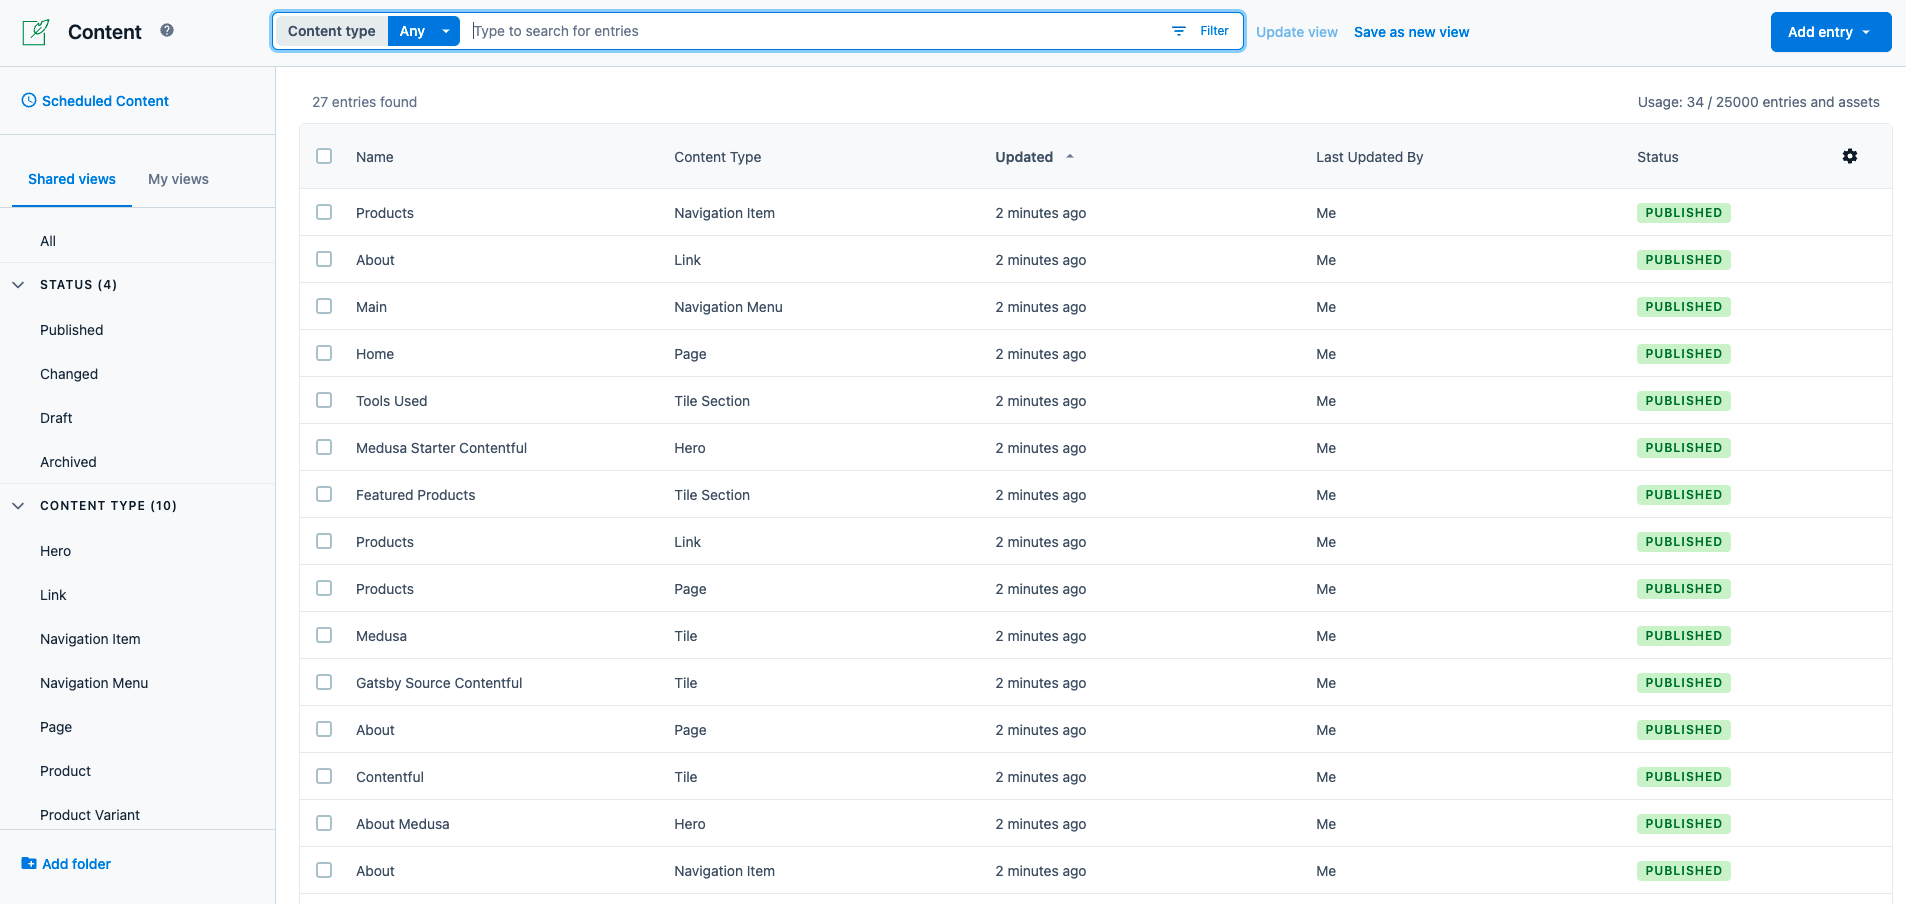
After this command finishes running, in your Contentful Space dashboard click on Content in the navigation bar. You should see a list of new content added.
(Optional) Seed Medusa Database
This step seeds your Medusa database with demo data to easily add products as well as other data to your Medusa backend.
Run the following command to seed the Medusa database:
npm run seed
Start the Backend
To start the backend run the following command:
npm run start
If you seeded the database with demo data, you should see that events related to the products are triggered.
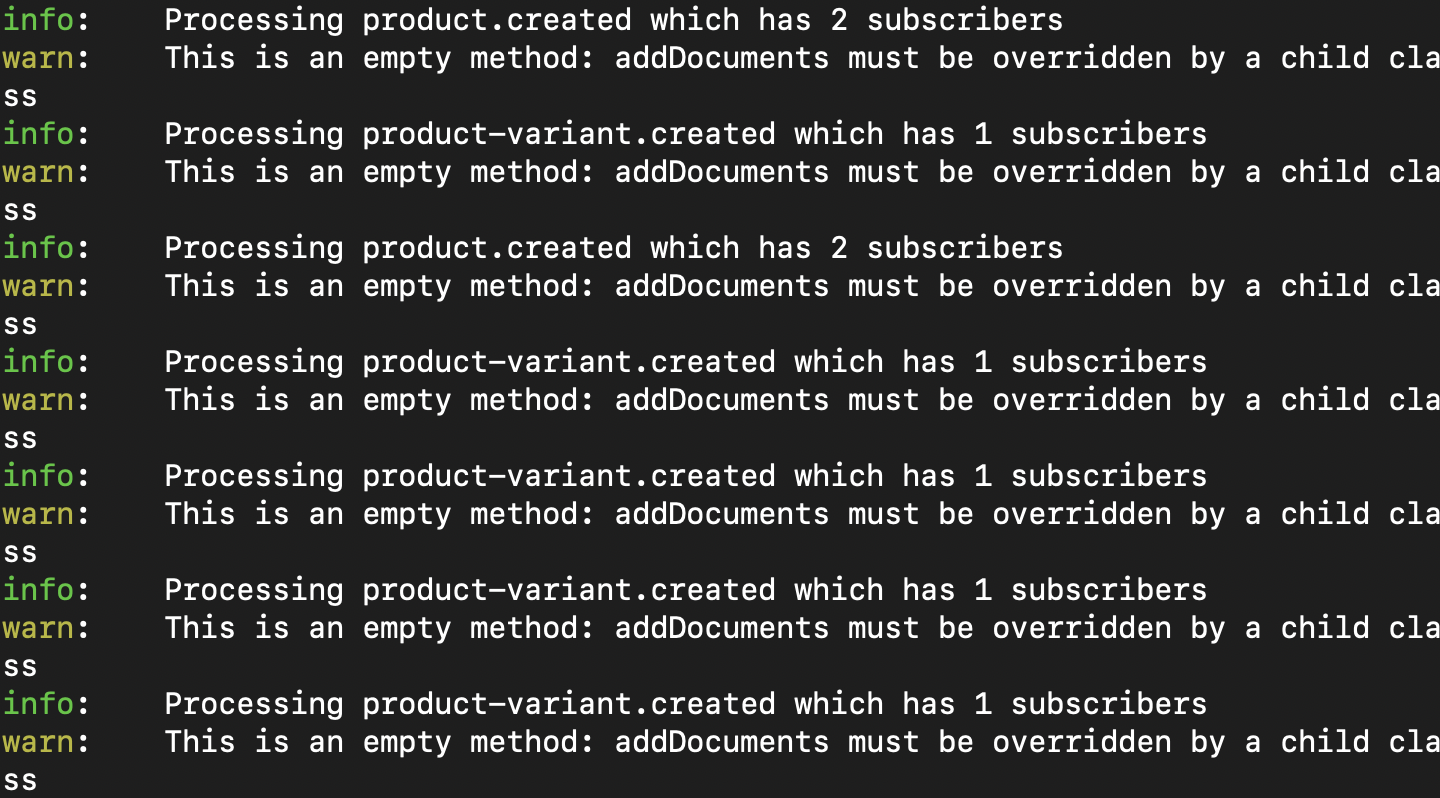
The Contentful integration ensures a two-way sync between the Medusa backend and Contentful. So, when new products are added to Medusa, these products will be added to your Contentful Space as well.
(Optional) Add Products with the Medusa Admin
Using the Medusa admin, you can add products to your Medusa backend. This will trigger product events that subsequently add these products to Contentful.
Manage Contentful Data
Publish Products
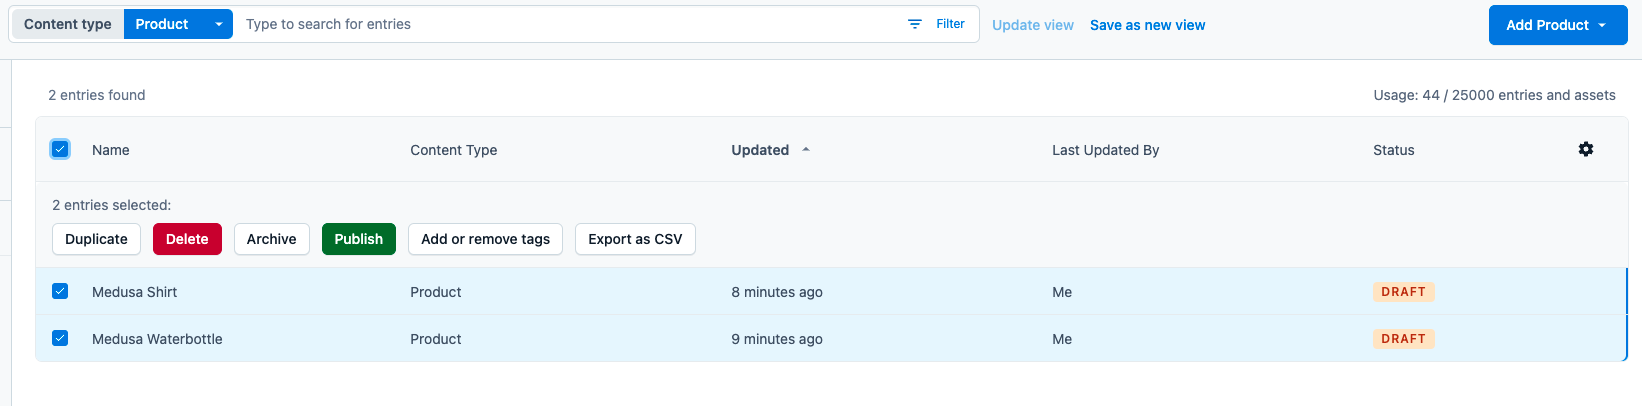
Products added through the integration with the Medusa backend are by default saved as drafts. To show them on the storefront, you must set them as published.
To do that, open your Contentful Space Dashboard and click on Content in the Navigation bar. Then, change Any to Product in the select field next to the search bar. This shows only the content of the type Product, rather than all content.
Click on the checkbox at the top of the table to select all products then click Publish to publish these products.
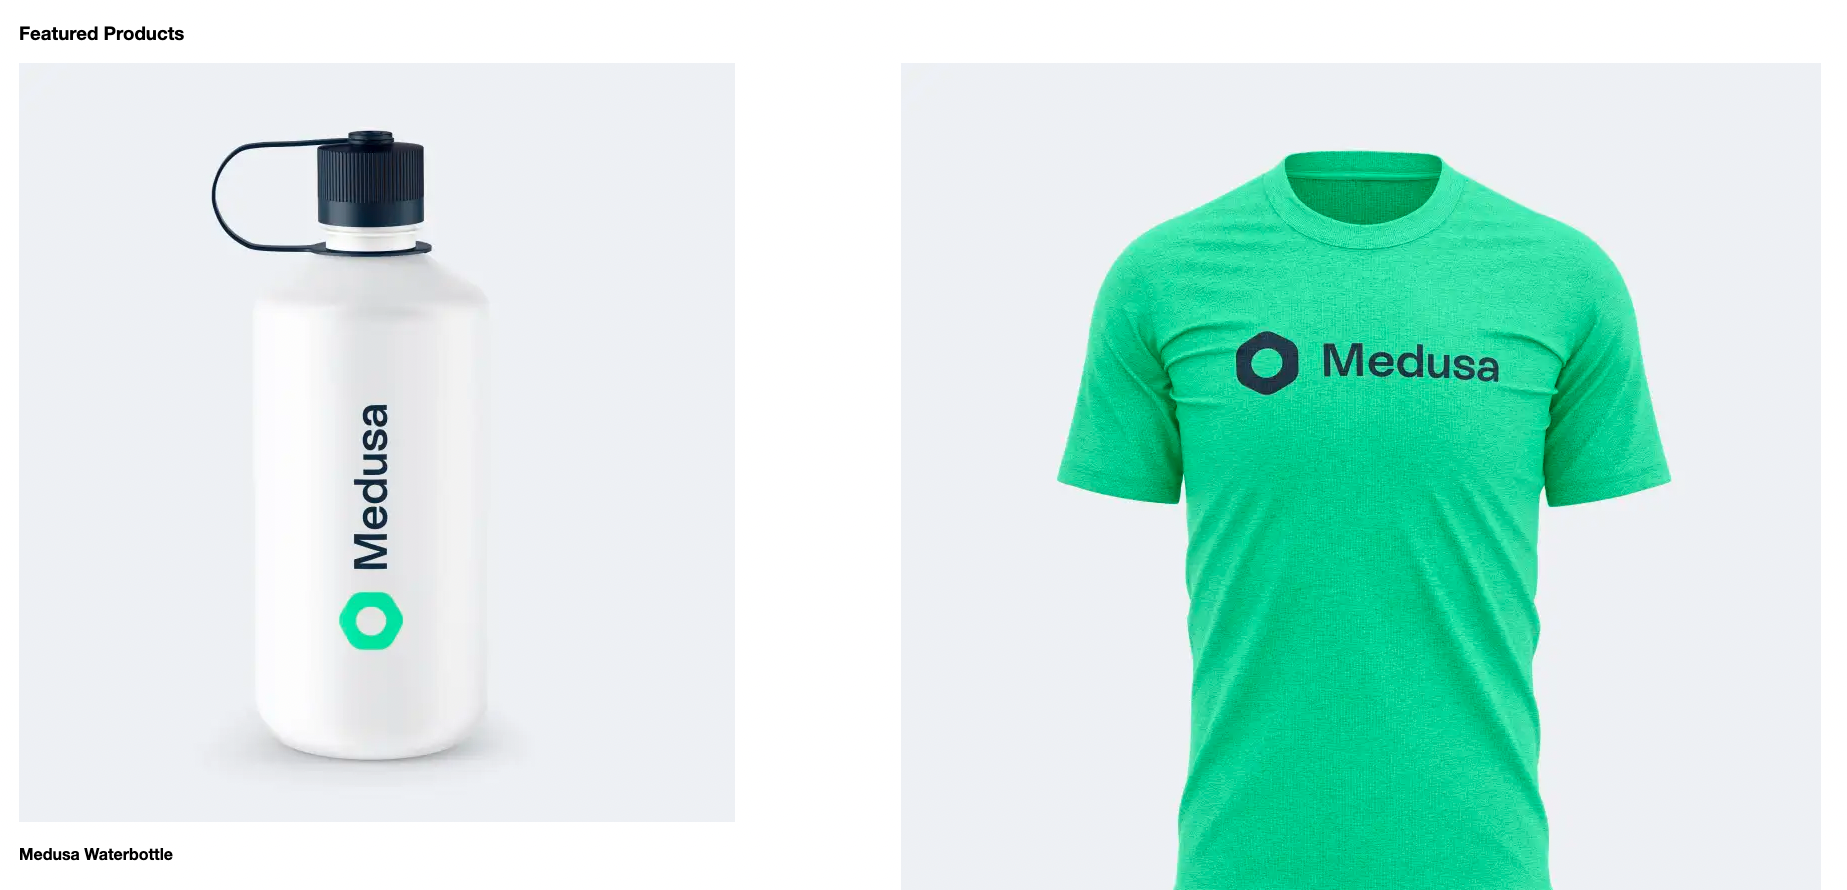
Added Featured Products
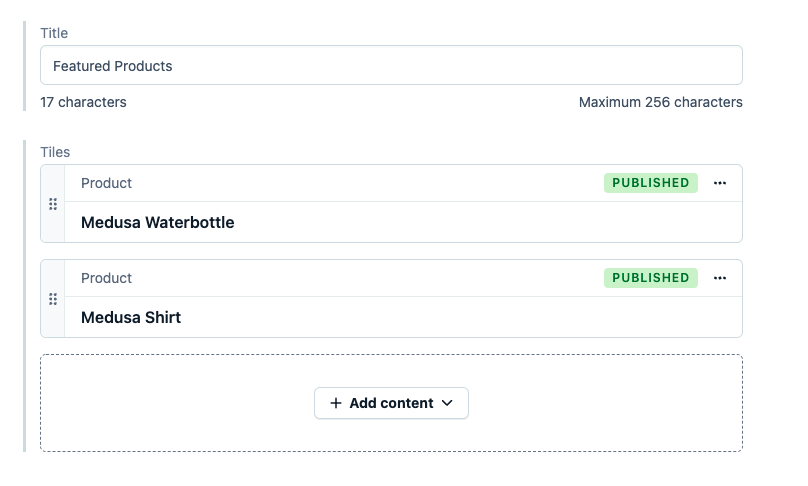
On the homepage of the storefront, there’s a featured products tile that shows a set of products. Before running the storefront, you must add at least one product to the list.
To do that, open your Contentful Space Dashboard and click on Content in the Navigation bar. Make sure the select field next to the search bar is set to Any and search for Featured Products. You should find one content of the type Tile Section.

Click on it. You should find on the page an empty Tiles section where you can add tiles and products.
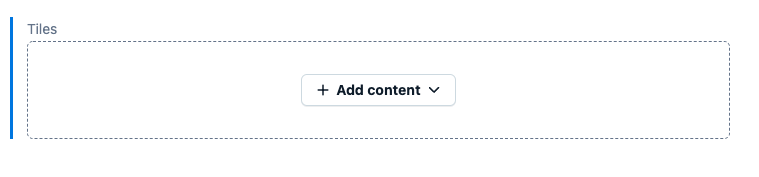
Click on Add content then on Add existing content and pick some of the products you want to show on the homepage.
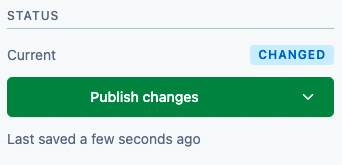
Once you’re done adding products, click on Publish changes in the right sidebar.
Setup Gatsby Storefront
In this section, you’ll set up the Gatsby storefront of your Medusa backend.
In your terminal in a different directory of the Medusa backend, run the following command:
gatsby new medusa-contentful-storefront https://github.com/medusajs/medusa-contentful-storefront
This will install the storefront in the directory medusa-contentful-storefront.
Set Contentful Environment Variables
Change to the newly created directory and rename .env.template:
mv .env.template .env
Then, open .env. You should find the following environment variables:
CONTENTFUL_SPACE_ID=
CONTENTFUL_ACCESS_TOKEN=
The value of CONTENTFUL_SPACE_ID is the same value you retrieved while setting up the Medusa backend.
To retrieve the value of CONTENTFUL_ACCESS_TOKEN, on your Contentful Space dashboard click on Settings then API keys. Then, choose the API key you created in the previous section.
You should find the field "Content Delivery API - access token”. Copy its value and set it as the value of CONTENTFUL_ACCESS_TOKEN.

Start Storefront
Make sure the Medusa backend is still running. Then, start the storefront:
npm run start
This starts the storefront at localhost:8000. Open it in your browser and you should see on the homepage the Featured Product section with the products you chose on Contentful.
Make Changes to Content
You can update the CMS content of your storefront in your Contentful Space. This includes the CMS pages or product details.
If you make changes to the data while your Gatsby storefront is running, the changes are not reflected instantly. That’s because the data is fetched from Contentful during build time. Instead, you must restart your Gatsby storefront to see the changes you make.
What’s Next
Learn How to customize your Contentful backend and storefront.
See Also
- How to deploy your Medusa backend to Heroku, Qovery, or DigitalOcean.
- How to deploy your Gatsby storefront to Netlify.